You pull into the driveway after a long day, hit the button, and watch the garage door roll up. Instead of a welcoming, organized entry, you face a wall of plastic bins, leaning rakes, and stray tools scattered across the floor. That heavy feeling in your chest is a sign that your storage has lost its way.
We often treat the garage like a household junk drawer, letting it fill up until we can barely park the car. But this zone has massive potential. You do not need to spend thousands of dollars on custom cabinetry to fix it. With a few intentional, budget-friendly choices and basic raw materials, you can establish clear focal points and visual harmony. Let’s look at how to build a highly functional, curated setup using cheap garage organization ideas that look incredibly premium.
Why An Organized Garage Matters
A chaotic garage does more than ruin your home’s curb appeal; it drains your daily energy. When you cannot find a basic screwdriver or a roll of tape, simple tasks turn into frustrating search missions.
Modern homeowners are moving toward biophilic design and earthy palettes inside, and that desire for calm is spilling out into utility zones. Streamlining your storage solves real everyday problems. It eliminates tripping hazards, protects expensive seasonal gear from moisture, and clears the mental clutter that comes with physical mess. Taking control of this footprint allows you to maximize your layout and establish a welcoming transition between the outdoors and your living spaces.
13 Budget-Friendly Garage Styling Ideas
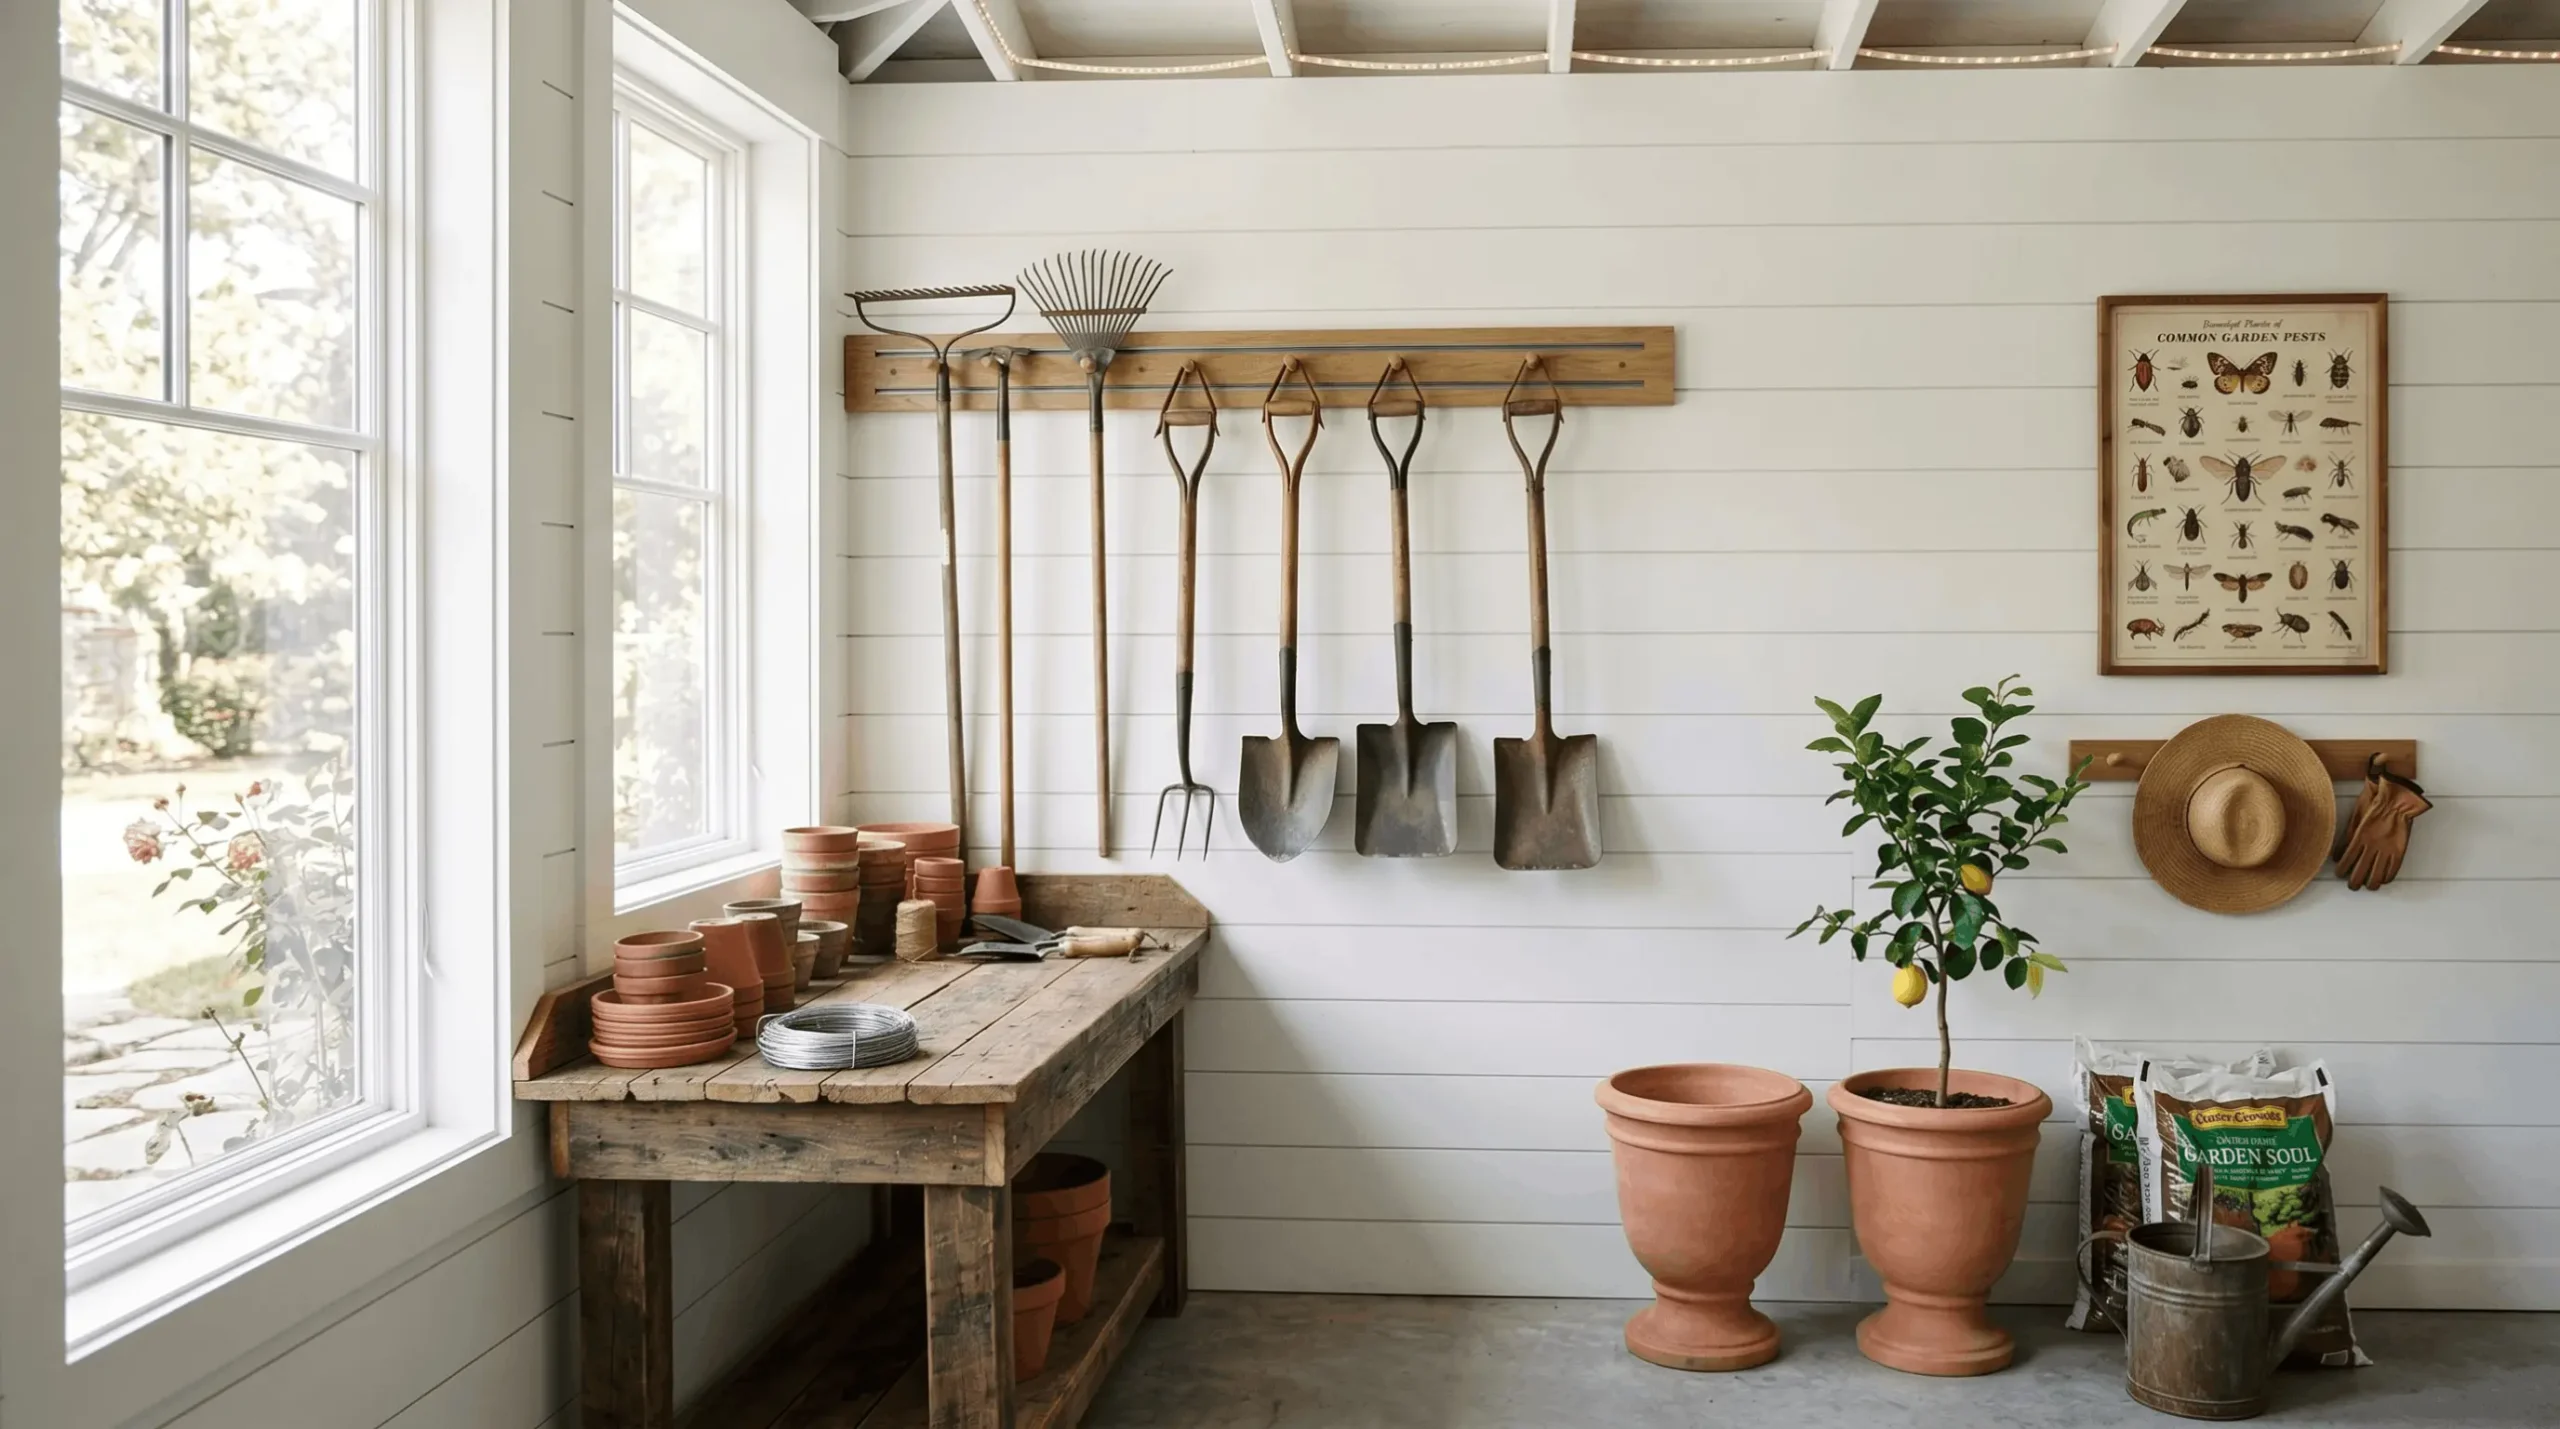
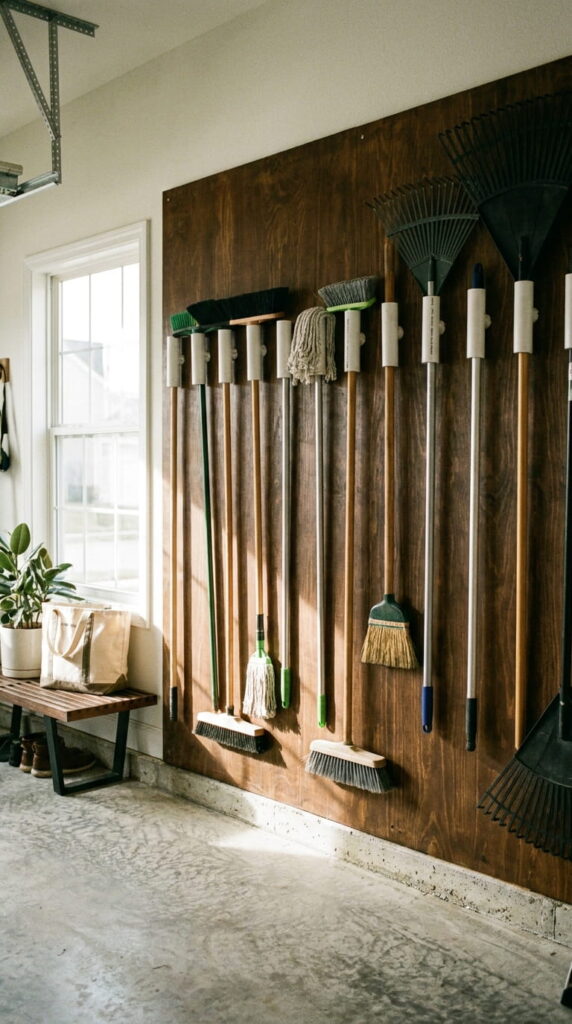
1. Build a Dedicated Garden Station with Wall Tracks
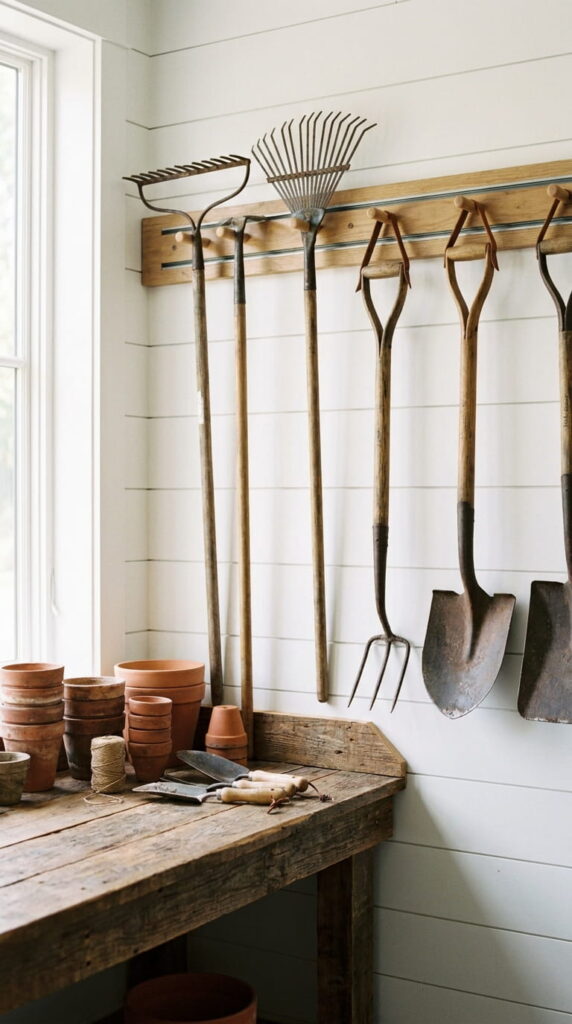
Grouping your garden tools into a single, cohesive visual zone instantly anchors the room. Instead of letting shovels and hoes cluster in corners, use an affordable wall-mounted track system. Hang long-handled tools vertically to draw the eye upward and keep the floor entirely clear.
- Why it works: It establishes a clear, intentional layout and prevents heavy items from falling over.
- Where it works best: The wall closest to your backyard entry or lawn mower parking.
- Practical Styling Guidance: Secure a heavy-duty wooden utility rail directly into the wall studs. Space your hooks roughly 8 inches apart so tool heads do not overlap or tangle.
- Common Mistakes: Hanging items too high to reach comfortably, which discourages people from putting them away.
2. Group Toys in Wire Wall Baskets
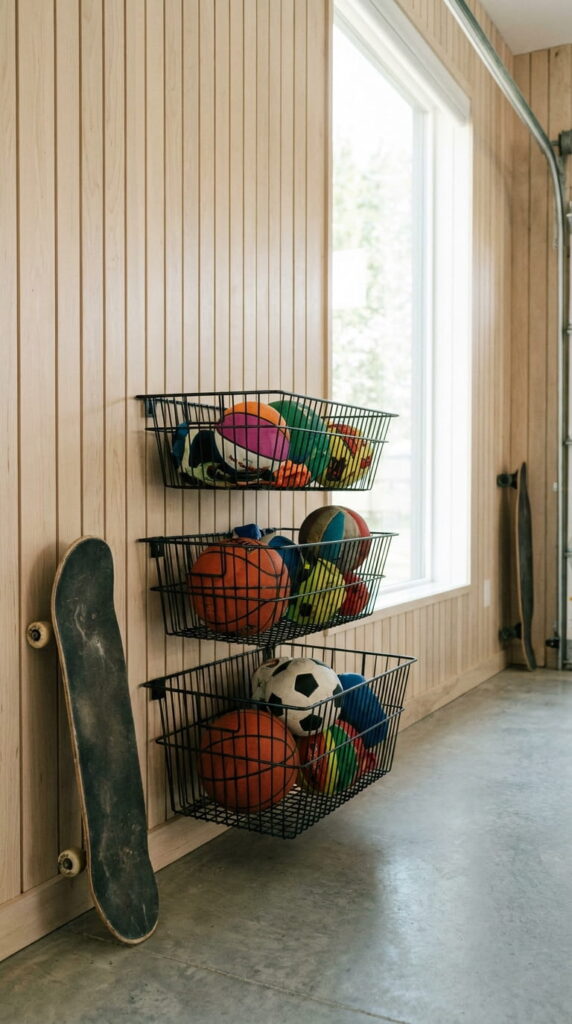
Sports balls, skateboards, and outdoor toys constantly roll around and create chaos. Mounting open wire baskets directly to the wall lets you see exactly what is inside while keeping items easily accessible for kids.
- Why it works: Woven or open wire elements add rich, tactile textures while offering complete visibility.
- Where it works best: Low down on a central wall, well away from moving vehicles.
- Practical Styling Guidance: Use three tiered wire baskets labeled by category—like balls, water toys, and safety gear.
- Common Mistakes: Using solid, opaque plastic tubs where small toys get buried at the bottom and forgotten.
3. Maximize Spatial Dynamics with Overhead Joist Shelving

The space between your garage door tracks and the ceiling is prime real estate. You can build simple, sturdy wooden platforms that hang from the ceiling joists to store items you only use once a year.
- Why it works: It clears bulky bins out of your direct line of sight, maximizing your available natural light.
- Where it works best: Suspended directly above the garage door tracks or along the back header wall.
- Practical Styling Guidance: Construct simple wooden drop-down frames using 2×4 lumber and thick plywood. Secure them with heavy-duty lag bolts into the ceiling joists.
- Common Mistakes: Overloading the overhead platforms past their weight limits or blocking the garage door mechanism.
4. Create a Clean Pegboard Workspace
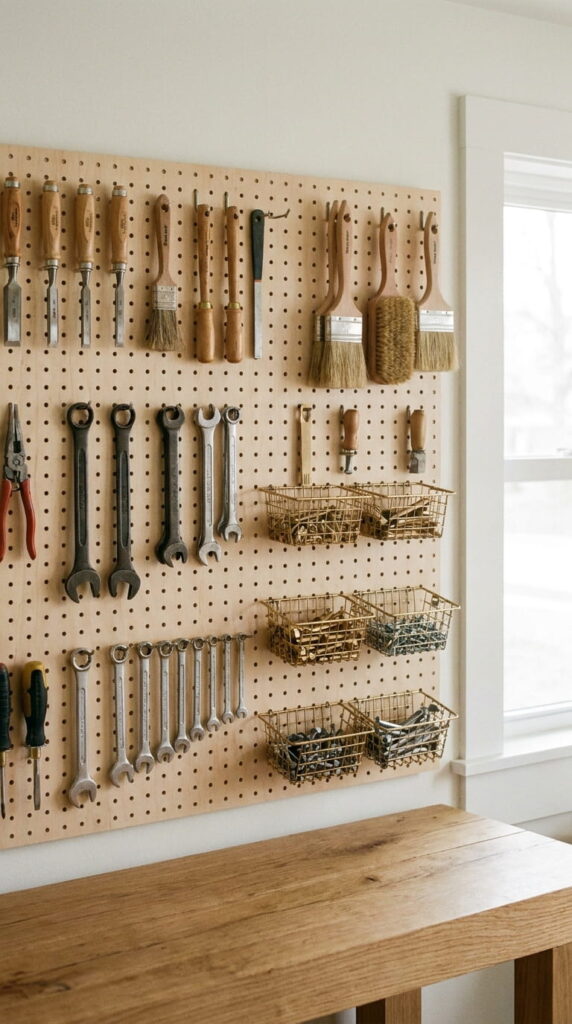
A classic wooden or painted pegboard offers incredible flexibility for hand tools. It keeps your workspace tidy and turns everyday utility items into a structured visual display.
- Why it works: It builds an active focal point that celebrates artisan craftsmanship and keeps counters clear.
- Where it works best: Directly above a workbench, potting table, or assembly station.
- Practical Styling Guidance: Mount 1×2 wood furring strips behind your pegboard to create a necessary gap for hooks, then frame the outer edges with scrap trim for a polished finish.
- Common Mistakes: Forgetting to secure the peg hooks with plastic locks, causing the hooks to pull out whenever you grab a tool.
5. Utilize Scrap PVC Pipe for Long-Handled Tools
Instead of buying expensive storage racks, cut leftover PVC pipes into short sleeves. Bolt them to the wall to create individual, upright slots for brooms, rakes, and weed eaters.
- Why it works: This layout uses vertical styling to turn awkward, loose items into an orderly alignment.
- Where it works best: In narrow, tight spaces behind side entry doors or next to support pillars.
- Practical Styling Guidance: Slice 3-inch PVC pipe into 6-inch segments at a slight angle. Attach two segments per tool to a backer board—one at hip height and one near the shoulder.
- Common Mistakes: Using pipes with diameters that are too narrow, which traps wider tool handles.
6. Design a Cohesive Open Shelving Wall

Industrial freestanding shelves are affordable and highly durable. By pairing them with matching, muted tones or uniform bins, you can mimic the look of expensive built-in cabinetry.
- Why it works: Layered decor principles keep the space feeling open, airy, and organized.
- Where it works best: Along the primary long wall connecting the garage to your home’s main entrance.
- Practical Styling Guidance: Line up two or three identical budget shelving units. Group your items into matching grey or black plastic totes to keep things looking uniform.
- Common Mistakes: Mixing different styles, heights, and colors of shelves, which makes the wall look cluttered.
7. Repurpose a Wooden Table into a Potting Bench
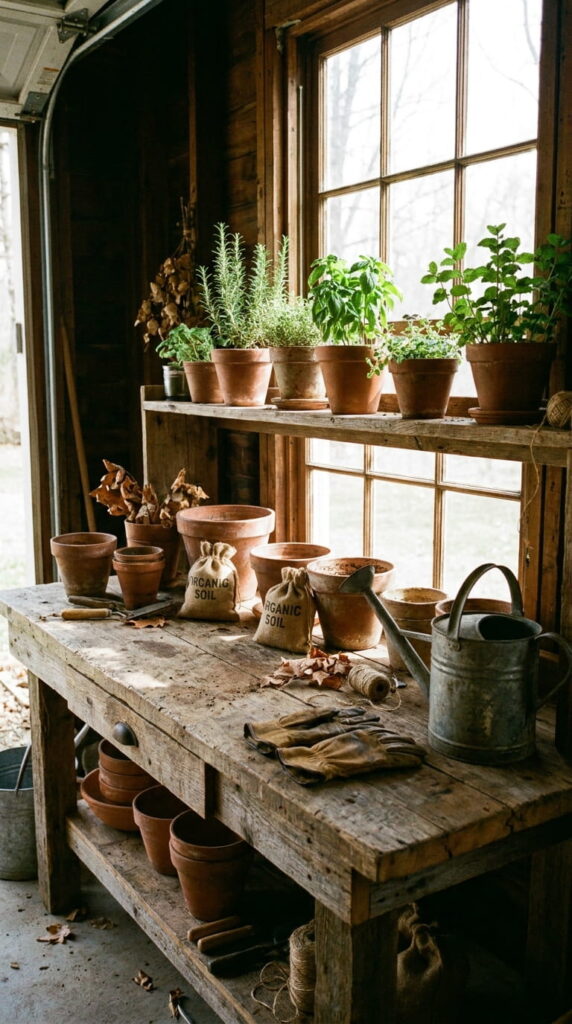
Give an old, weathered wooden table a second life as a dedicated gardening or crafting station. The raw finishes and rich grains introduce a warm, human touch to a concrete space.
- Why it works: Embraces a timeless styling approach by mixing utility with natural materials.
- Where it works best: Near a window or glass door to take full advantage of natural light.
- Practical Styling Guidance: Sand down an old table and seal it with a clear, water-resistant topcoat. Add small metal hooks along the apron to hang hand trowels and brushes.
- Common Mistakes: Leaving the wood completely untreated, which leads to rotting and stains from wet soil.
8. Build a Modular Scrap Wood Lumber Rack
If you enjoy DIY projects, loose wood cutoffs can quickly clutter your floor. You can build a sturdy, multi-tiered wall rack using leftover 2×4 scraps to stack boards horizontally by size.
- Why it works: Clears up valuable floor space while organizing your materials by length.
- Where it works best: High up on a back wall, well above your primary workspace.
- Practical Styling Guidance: Install vertical 2×4 studs along the wall, then attach short, angled cantilever arms every 12 inches to support the weight of your lumber.
- Common Mistakes: Storing wet or green wood on the rack, which can cause the boards to warp over time.
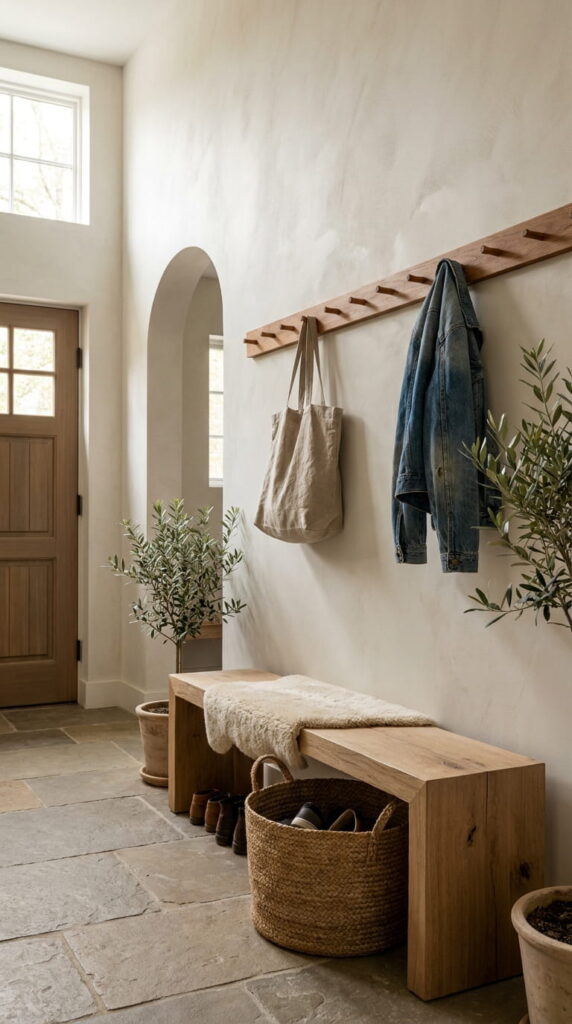
9. Establish an Entryway Drop Zone

The transition space where the garage meets your home’s interior door often collects discarded shoes, backpacks, and coats. Turn this spot into an intentional, welcoming mudroom zone.
- Why it works: Creates a soft, practical transition that protects your main living spaces from outdoor dirt.
- Where it works best: Directly adjacent to the interior door leading into the house.
- Practical Styling Guidance: Mount a row of sturdy shaker pegs for coats, and place a simple wooden bench below with open space for boots.
- Common Mistakes: Allowing the drop zone to expand too far outward, which can block the walkway or car doors.
10. Implement Bungee Cord Sports Totes
Storing lightweight, awkward items like basketballs and soccer balls can be tricky. You can build a simple open-front wooden frame and stretch flexible bungee cords vertically across the opening to hold them in place.
- Why it works: Keeps balls contained while allowing you to pull them out easily from any point in the rack.
- Where it works best: Mounted to the side of a tall shelving unit or nestled into an unused corner.
- Practical Styling Guidance: Build a simple rectangular box out of scrap plywood. Drill holes in the top and bottom lips, then thread four bungee cords tightly through the front opening.
- Common Mistakes: Making the box too deep, which makes it hard to grab items that fall to the back.
11. Sort Hardware into Labeled Mason Jars
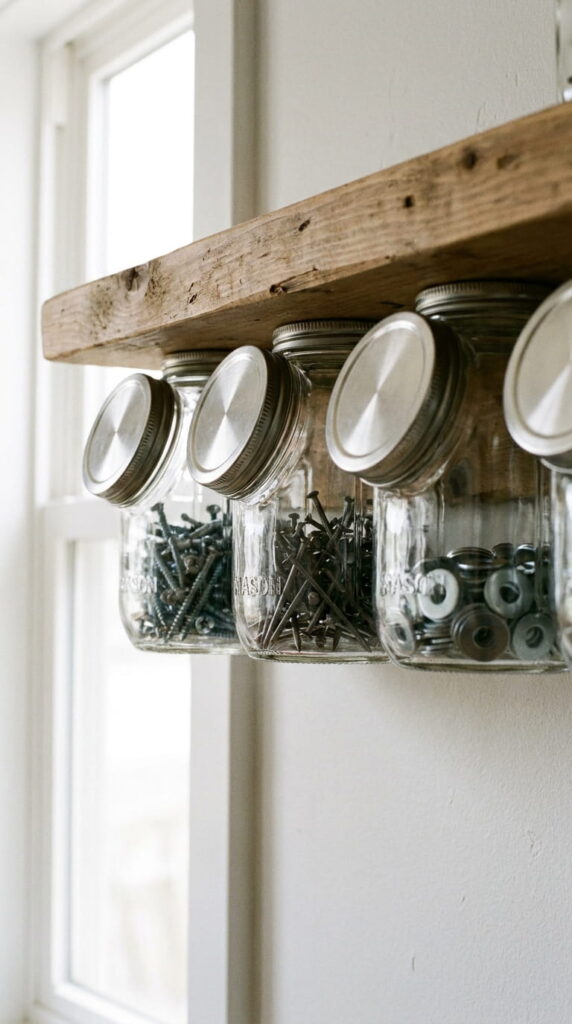
Small nails, screws, and washers easily vanish in deep drawers. Mount the metal lids of old glass food jars to the underside of a wooden shelf, then screw the filled jars back into place.
- Why it works: Frees up shelf space while using transparent glass to show exactly what hardware you have on hand.
- Where it works best: Suspended directly beneath your eye-level workbench shelves.
- Practical Styling Guidance: Clean your jars thoroughly, secure the lids using two short wood screws per lid, and arrange them by hardware size.
- Common Mistakes: Overtightening the glass jars, which can crack the rims or strip the metal threads.
12. Mount an Extension Cord Corner
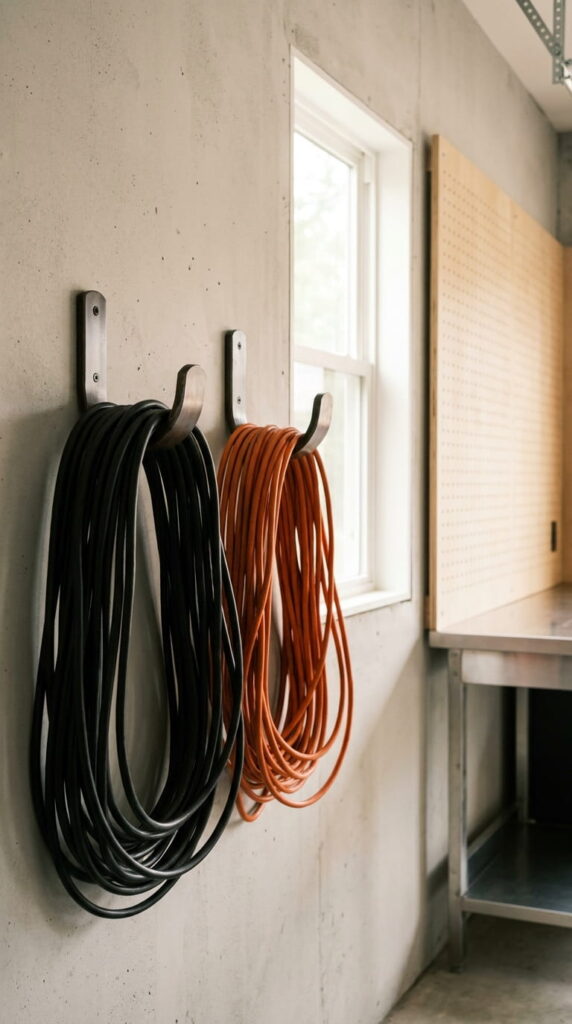
Tangled extension cords are frustrating and can be safety hazards. You can loop long cords neatly over cheap, curved garden hose reels or deep utility hooks to preserve their internal wiring.
- Why it works: Protects your gear from kinks and damage while creating a tidy, graphic look on the wall.
- Where it works best: Near your primary electrical outlets or workbench power strips.
- Practical Styling Guidance: Mount heavy-duty plastic or metal hose saddles 4 feet off the ground, and wrap your cords loosely in wide, natural loops.
- Common Mistakes: Coiling cords too tightly, which damages the internal copper wires and makes them difficult to unroll.
13. Create a Tape and Roll Dispenser
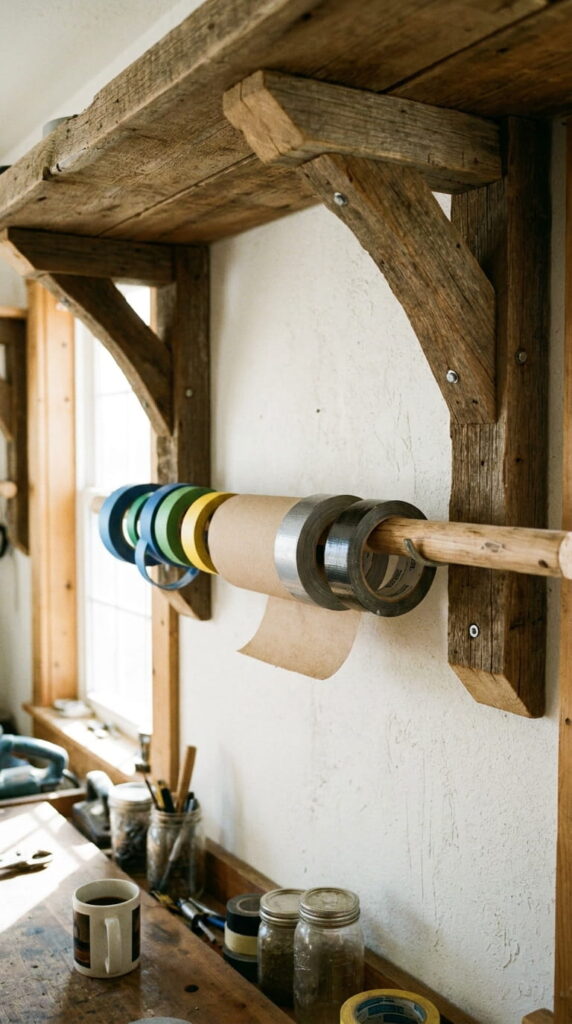
Rods of painter’s tape, duct tape, and paper towels often end up rolling around loose in drawers. Stringing them onto a simple wooden dowel creates an efficient, custom dispensing station.
- Why it works: Brings small, miscellaneous items together into a clean, unified display.
- Where it works best: Mounted directly to the side of your main pegboard or tool cabinet.
- Practical Styling Guidance: Screw two wooden corbels or brackets into the wall, drop a 1-inch wooden dowel into place, and slide your tape rolls onto it.
- Common Mistakes: Forgetting to leave extra room on the dowel to slide new rolls on and off easily.
Expert Design Principles
When designing a hard-working utility zone like a garage, balancing scale and proportion is essential. As noted by leading design publications like Architectural Digest, a successful room relies on balancing heavy visual pieces with open, breathing room. Keep your bulky bins low or tucked away overhead, and use open, slender systems like pegboards at eye level to keep the space feeling light and airy.
FAQs: Smart Garage Organization Tips
Finding Your Method
Organizing a busy garage is not about creating a sterile, picture-perfect showroom. It is about building a supportive, functional space that accommodates your real-life projects, hobbies, and routines. By using these affordable storage ideas and focusing on smart vertical layouts, you can transform a chaotic catch-all into an orderly, efficient workspace. Trust your styling instincts, tackle one zone at a time, and shape a home that supports your daily life